Teams Settings
Overview
Teams Settings is where Owners and Admins manage everything about their Floyo team — from branding and membership to billing and usage tracking. Each area is covered in its own dedicated page.
Accessing Teams Settings
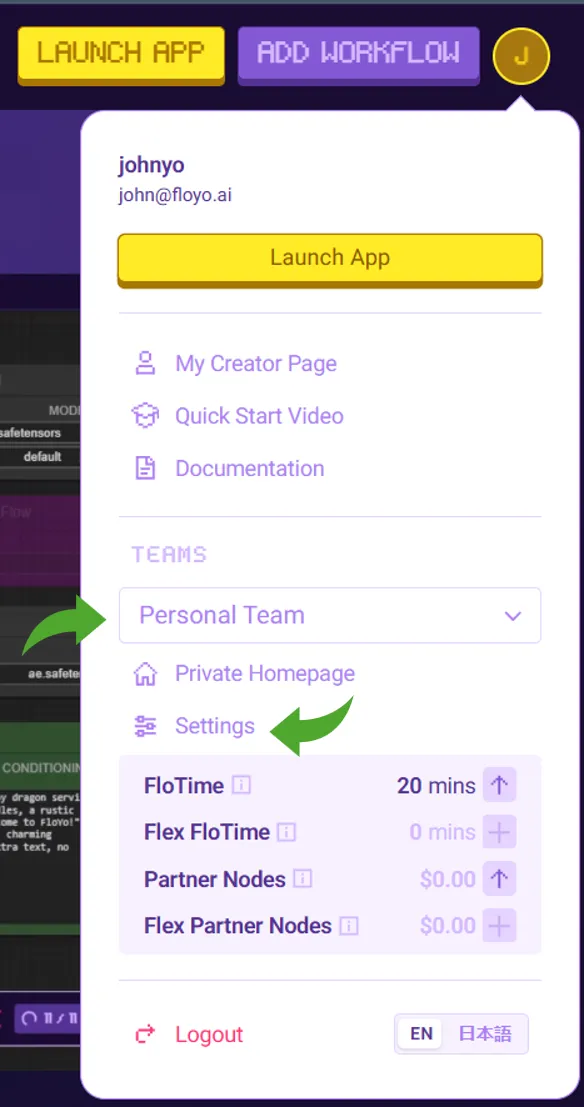
- Click your profile icon in the top-right corner
- Under TEAMS, select the team you want to manage
- Click Settings
Settings Sections
General
Set your team's identity: team name and custom team URL. These are visible to all members and appear across the platform wherever your team is referenced.
Members & Invitations
Invite new members by email, assign roles (Member or Admin), and manage pending invitations. This is also where you remove members or resend invites that haven't been accepted.
Plans & Billing
View and manage your team's subscription plan, FloTime & Partner Nodes credit balances, and Flex FloTime and Flex Partner Nodes credit purchases. Enterprise teams and Workspaces see a simplified view since billing is managed directly with Floyo.
Usage
Track your team's GPU usage over time with date range filtering, daily breakdowns, and per-member usage stats. Useful for understanding how FloTime is being consumed across your team.
→ Usage
Tips & Best Practices
- Set your team URL early: It's used in links shared across the platform, so pick something clean and recognizable
- Use Admin roles sparingly: Admins have full access to settings — assign only to those who need it
- Check usage regularly: Monitor FloTime consumption to avoid running out mid-project