Masking
Masking lets you define specific areas of an image for a workflow to affect, so you can edit, regenerate, or remove just the regions you choose instead of changing the whole image. It powers inpainting, object removal, background replacement, and other targeted edits.
Overview
Instead of applying changes to an entire image, masking lets you select only the regions you want to edit, regenerate, or remove. Masks are commonly used for inpainting, object removal, background replacement, and other targeted image-editing workflows.
Example Workflows for Face Swap
Using the Mask Editor
To create a mask:
Step 1: Open the Workflow
Upload or select an image in your workflow.
Right-click the image input and select Open Mask Editor.
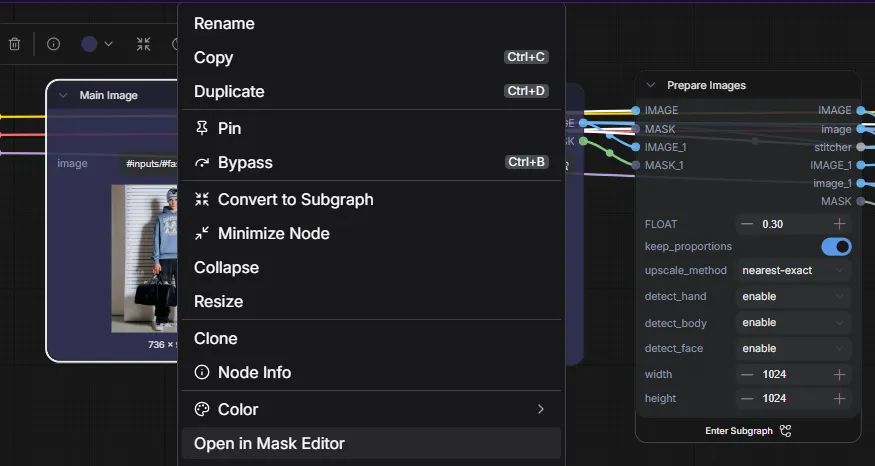
Step 2: Create Your Mask
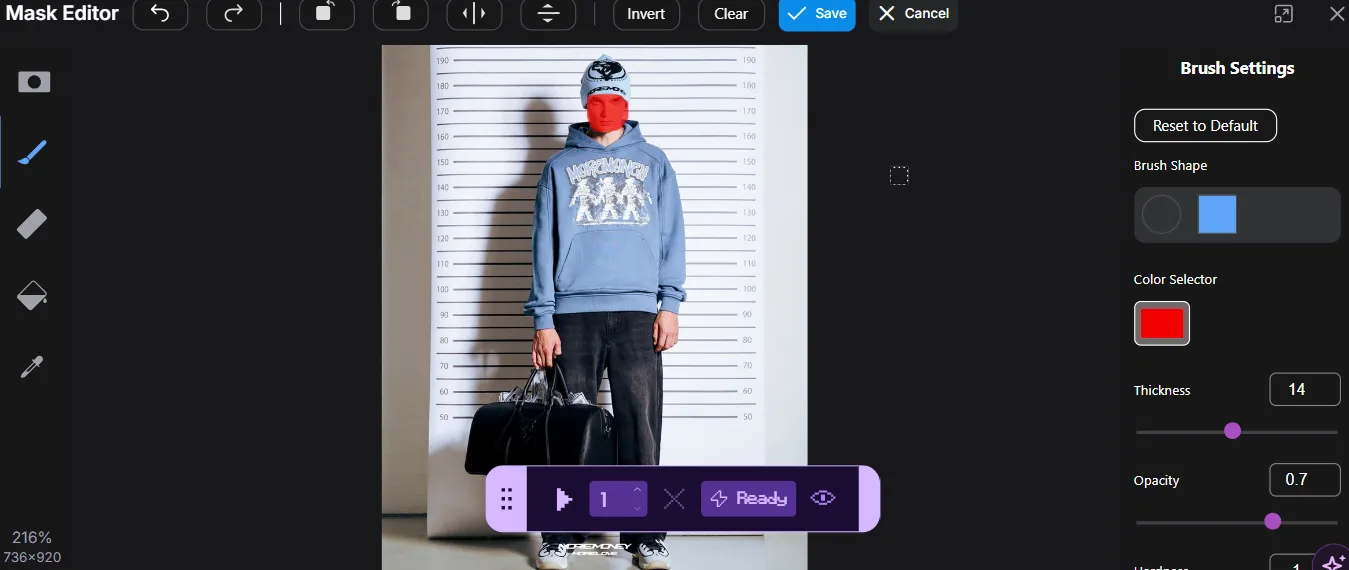
Once the Mask Editor opens, use the brush tool to paint over the areas you want to modify.
The painted area represents the portion of the image that will be affected by the workflow.
You can continue painting and adjusting the mask until the desired area is selected.
Step 3: Save the Mask
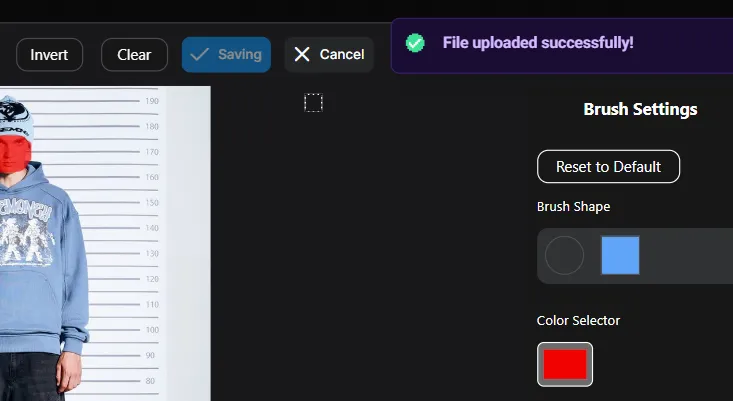
After creating your mask, click Save.
The mask will be attached to the image and passed to any workflow nodes that support masking.
These workflow demonstrates how masks can be used to control which parts of an image are edited while preserving the surrounding content.
Step 4: Run the Workflow
Click the Play button in the bottom toolbar to start processing.
Once the workflow completes, the generated image will be available in the outputs folder.
KEY CONCEPT: The painted area is the part that gets changed. Everything you leave unpainted is preserved. Keep this in mind so you mask the region you actually want the workflow to edit.
Common Use Cases
Inpainting
Inpainting uses a mask to regenerate or replace content within a selected area of an image. This is commonly used to remove unwanted objects, replace specific elements, fix imperfections, or make localized edits while preserving the rest of the image.
Recommendation for workflows:
For more info. you can also visit our use-case page -
Outpainting
Outpainting extends an image beyond its original boundaries. By defining the areas that should be generated, you can expand backgrounds, create wider compositions, or add additional scene content while maintaining consistency with the original image.
Recommendation for workflows:
For more info. you can also visit our use-case page -
Background Replacement
Masks can be used to isolate a subject from its surroundings, allowing you to replace the background with a completely new scene. This is useful for product photography, portraits, marketing assets, and creative image generation.
Recommendation for workflows:
Tips
- Paint slightly beyond the edges of the object for smoother results.
- Use a smaller brush size when working on detailed areas.
- Review your mask before saving to ensure only the intended regions are selected.
- Complex edits often produce better results with clean and accurate masks.