File Browser
Overview
Your files on Floyo are organized in a cloud-based file system that persists across sessions. Use the File Browser (My Files) to upload, organize, and manage all your workflow assets.
Opening the File Browser
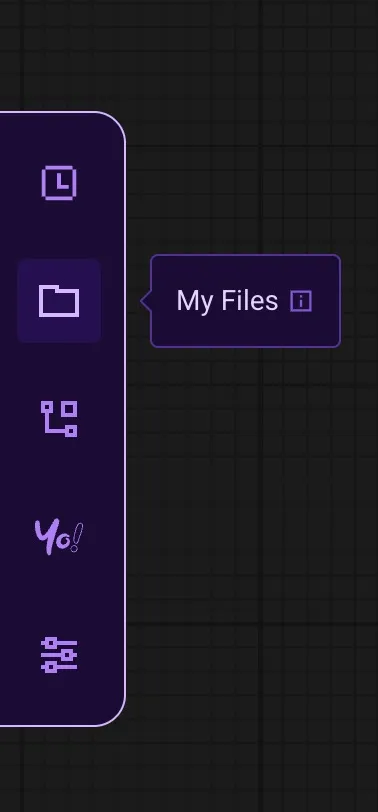
Click the folder icon in the left sidebar (middle icon) to open the File Browser panel.
Folder Structure
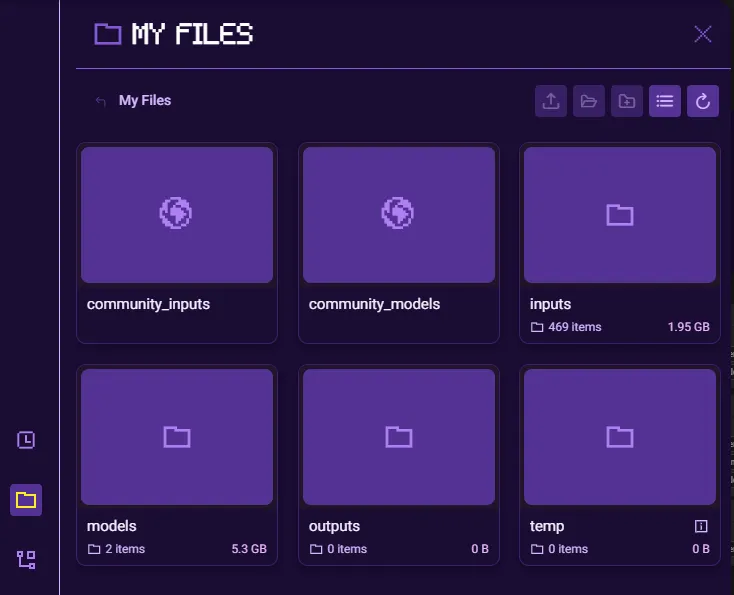
Your workspace contains six main folders:
Folder | Purpose | Notes |
|---|---|---|
inputs | Images, videos, and other files you upload for use in workflows | Files uploaded via nodes also appear here |
outputs | Generated results from your workflow runs | Organized by run |
models | Your uploaded LoRA models | Personal models only |
temp | Temporary files created during workflow execution | Auto-cleared periodically |
community_inputs | Shared input files from community workflows | Read-only |
community_models | Shared models from the Floyo library | Read-only |
Uploading Files
Method 1: File Browser Upload
- Open the File Browser
- Navigate to the destination folder (typically inputs)
- Click the upload icon (↑) in the toolbar
- Select files from your computer
Method 2: Node Upload
Many nodes have a "choose file to upload" option that opens your system file picker. Files uploaded this way are automatically saved to your inputs folder.
Supported file types:
- Images: PNG, JPG, JPEG, WEBP, GIF
- Video: MP4, MOV, WEBM
- Models: SafeTensors (LoRAs only for personal uploads)
- Other: JSON, TXT (for captions/metadata)
Managing Files
Navigating Folders
- Click a folder to open it
- Use the breadcrumb path at the top to navigate back (e.g., "My Files / inputs")
- Click the back arrow (←) to return to the parent folder
File Information
Each file displays:
- Thumbnail preview (for images/videos)
- Filename
- Date modified (MM/DD/YY H:MM AM/PM)
- File size
View Options
Toggle between grid view and list view using the toolbar icons.
Toolbar Actions
Icon | Action |
|---|---|
↑ | Upload files |
↓ | Download selected files |
📁+ | Create new folder |
≡ / ⊞ | Toggle list/grid view |
↻ | Refresh file list |

File Options (Three-Dot Menu)
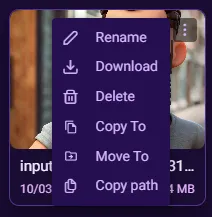
Hover over any file or folder to reveal the three-dot menu (⋮) in the top-right corner of the tile. Click it to access file actions.
Standard Options (All Folders)
Option | Description |
|---|---|
Rename | Change the file or folder name |
Download | Download the file to your computer |
Delete | Permanently remove the file or folder |
Copy To | Copy the file to another folder |
Move To | Move the file to another folder |
Copy path | Copy the full file path to clipboard |
Additional Option (Non-Input Folders Only)
Option | Description |
|---|---|
Copy path as input | Copies the file path formatted for use in workflow nodes. Use this to reference output files as inputs in subsequent workflows. |
Using Copy Path vs Copy Path as Input
- Copy path — Copies the file path in standard format:
#inputs/image.png- Copy path as input — Copies the path with the (as-input) prefix so workflow nodes recognize it as an input:
(as-input)#outputs/AceFaceSwap/result.pngPaste copied paths directly into node input fields that accept file paths.
Working with Files
Copying Files
To copy files between folders:
- Select the file(s)
- Click Copy to
- Choose the destination folder
Moving Files
To move files:
- Select the file(s)
- Click Move to
- Choose the destination folder
Deleting Files
To delete files:
- Select the file(s)
- Click the delete icon (🗑)
- Confirm deletion
⚠️ Warning: Deleted files cannot be recovered.
Creating Folders
- Navigate to the parent folder where you want to create a subfolder
- Click the new folder icon in the toolbar
- Enter a folder name
- Press Enter or click Create
Subfolders help you organize inputs by project or category.
File Persistence & Auto-Cleanup
Free Plan Users
Files in outputs and temp are automatically deleted after 72 hours to manage storage.
To preserve important outputs:
- Download files to your computer before they expire
- Upgrade to a paid plan for persistent storage
Paid Plan Users
Files persist indefinitely until manually deleted or storage limit is reached.
Tips & Best Practices
- Organize inputs by project - Create subfolders in inputs to keep assets organized
- Download important outputs immediately - Especially on free plans
- Monitor storage usage - Check the indicator at the bottom of File Browser
- Use descriptive filenames - Makes it easier to find files in node dropdowns
- Clear unused files regularly - Delete old inputs and outputs to free up space
Troubleshooting
Files not appearing after upload
- Click the refresh button (↻) in the toolbar
- Check you're in the correct folder
- Verify the file type is supported
Upload fails
- Check your remaining storage space
- Ensure file size doesn't exceed limits
- Try a different browser or clear cache
Can't delete files
- Ensure you have permission (community files are read-only)
- Check if file is currently in use by a running workflow